Easy Breezy

Easy Breezy
Being creative every day and making it look Easy Breezy!
Showing posts with label crafts. Show all posts

Friday, March 23, 2012

Preschool Crafts

One of my favorite themes to teach in preschool is Community Helpers.  February is Community Helpers month in my class and I thought I'd share a few things that we have fun doing.

Traffic Light Cookies  (oops it's upside down!)

Doctor Bags

All the supplies inside the doctor bag.

Dental Health Week -   The teeth are mini marshmallows.  I let the kids lick one end and stick it to the construction paper lips.  The sugar in the marshmallow acts like glue.

It always tickles me to see how each child applies their "teeth".

One of my favorite activites during dental health week is when we talk about healthy snacks and not-so-healthy snacks. I bring Oreo cookies, apple slices and a mirror to class. First I let them eat an Oreo and then show them how their teeth look when they eat not-so-healthy snacks.

Then I give them an apple slice to eat.

Afterwards I let them take a look in the mirror to see how nice and clean their teeth are after eating a healthy snack!

In Miss Wren's class we are all about some hats!  I love this little police hat and stop sign.  Of course, it reminded me of the Citizen's Arrest episode of the Andy Griffith Show, so we marched next door to Miss Peggy's class shouting "Citizen's Arrest! Citzen's Arrest!"

We had a real firetruck come to visit our class during Fire Safety Week, but guess which teacher forgot her camera that day!?

These hats make me want to say "Romper Bomper Stomper Boo".  Who remembers that from Romper Room back in the early 70s?  Man I'm old!

When I was explaining this theme to my class, we started listing people who are community helpers like policemen and doctors etc.  One little boy raised his finger into the air and proclaimed, "Witches are NOT helpers!"  You got that right buddy! 

Join Me Here:
Potpourri Friday

Friday, January 20, 2012

Oldies but Goodies

Okay, I'll confess, I have not bought the turquoise paint for my table, nor have I started on the second ugly chair, so I decided I would post some oldies but goodies.  These are some items that I have made in the past but not actually blogged about, so they'll be new to you, but old to me.  Anyway...  you've seen the wedding cake cookies I made for a friend and the apple cookies I made for my class, but here are a couple of other cookies I've done.
Ruler cookies for teacher appreciation week.  I placed this in a snack sized plastic bag with a label that read "Teachers Rule".

I made baby carriage cookies for several baby showers this year.

Along with making cookies, I've done a lot of sewing for my neice, but also for other friends babies.


A pink plisse' peasant dress and bloomers with white eyelet trim for my darling neice.  I think this is one of my favorite outfits.

A onsie decorated with fabric roses and bandana bloomers with eyelet ruffles I made for a friends new baby.

Another peasant dress for my neice.  I loved the fabric on this one.  I also made matching pants but forgot to take a picture of them.

A fully lined make-up bag made using bandanas. It was my first attempt at adding a zipper to something!

Besides sewing, I did a little crafting too.

 For a last day of school gift for my class I printed a tag that read "Stay Cool This Summer" from some site I found online (wish I could remember where) and tied it with curling ribbon around several unfrozen ice pops.

Fish bowls made using rice cakes, blue icing and goldfish crackers during "pets" week at preschool.

I actually started on a new craft today - a burlap wreath!  I ran out of burlap ribbon so I've got to run back to Michael's but I will post about it the minute I am finished.  I also bough the fabric for my second ugly chair, so I hope to have that started and finished soon too!  I've got lots of projects planned and I can't wait to get started!


Saturday, November 19, 2011

Lovin' Some Mesh!

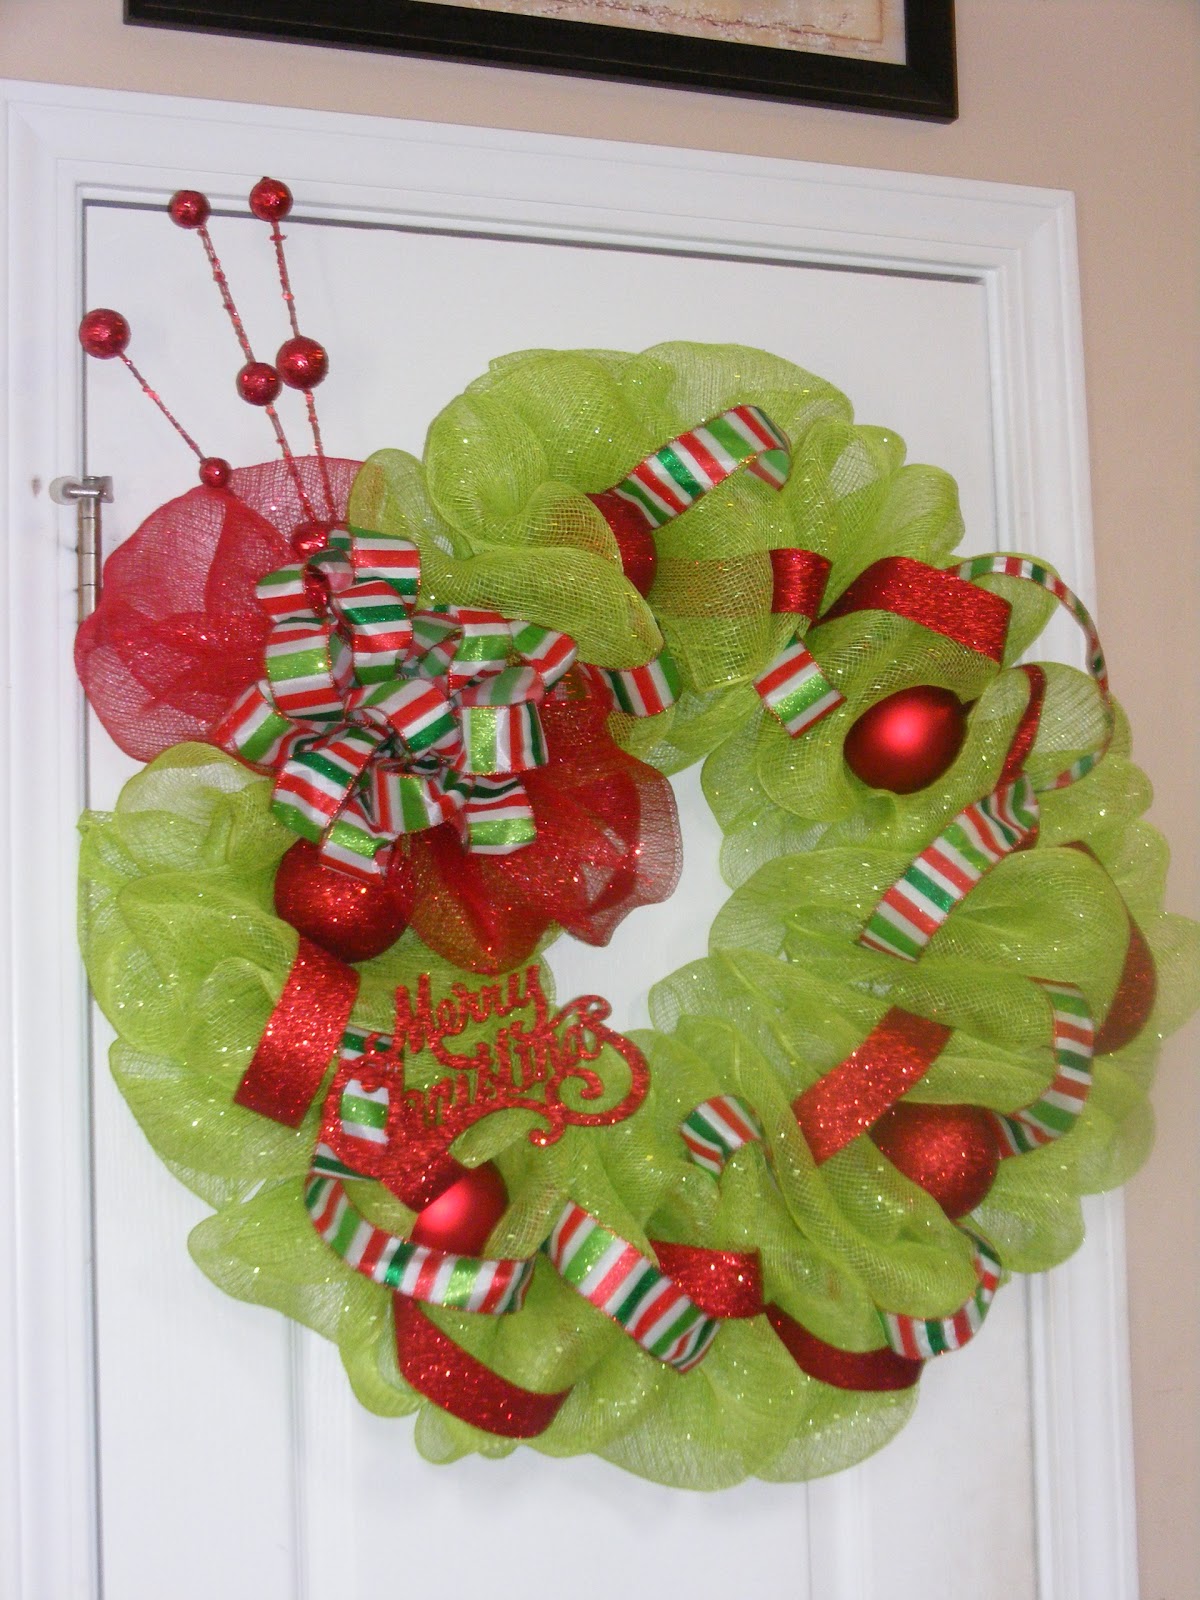
I've had the opportunity to visit some craft fairs lately in my area.  I love, Love, LOVE going to Christmas Made in the South every year.  I went one weekend down in Columbus and then the next weekend when they were in Macon.  I live kind of in the middle, so I went to both!  Then this weekend I went to the Mistletoe Marketplace down in Perry.  The hot item seemed to be the booths that were selling wreaths and bows out of deco mesh!  Have y'all heard of this stuff??  It is awesome!  It's a 21 inch wide mesh that is weather proof.  It comes in lots of colors and patterns too.  I am wild about it!  Wild I say!!

If y'all are like me though, you look at these gorgeous things and say, "I can make that!"  Half the time I never do make it, but this time I did!  I marched myself to Hobby Lobby and bought some of that mesh and a wreath frame and some coordinating ribbon and I got busy.  Here is the result!
I used an 18 inch wire frame


I found this ornament for 99 cents at Walmart and hot glued it onto the mesh


I found this wired ribbon at Hobby Lobby.  I made a bow and added it on top of a red mesh bow.

I love this glittery pick.

I found this glittery ribbon and ornaments at Walmart
I am so thrilled with my wreath!  I even bought more of the mesh and I have big plans to transform my garland around the door and down my stairs and on the mantle!  Those things will have to wait until after Thanksgiving though.  I can only handle one holiday at a time!

Join me here:

Monday, August 29, 2011

Back to School

I started teaching preschool over a decade ago and have loved every minute of it.  Every year I love my class so much that I think the new class cannot possibly measure up and I'll just have to do my best to be nice to them!  Turns out I love my new class every bit as much.  This year I have a class with personality to spare!  It's going to be the most fun year ever.  There is no way next year's class can come close, but I'll try to be nice! :)

Other than the kids, one thing I love is decorating my classroom.  I guess that just goes along with how I like to decorate my house too.  The hubs asked me once, "do you have to decorate for every occassion?"  After a bit of thought, I replied with a deep and meaningful answer, "well, duh!"

Here are a collection of bulletin boards and decorations I have done over the years.
This was my first bulletin board.  Aren't those the worst paint splatters ever?  I've come a long way since "Our Colorful Class"


I like using the students art work as much as possible.

For the corn cobs I had the class put yellow fingerprints all around a toilet paper tube.  Easy Breezy!

I made these cute hats out of construction paper, added curling ribbon for confetti and on a later bulletin board I added those party horns that you get at parties where the paper unrolls when you blow it.

This was super easy too.  I just sponged the bricks on white paper using a kitchen sponge and red paint.  I then added my class' names onto Santa's list.  I think a cut out of Santa or an Elf holding the list would have been cute, but I couldn't find one anywhere when I needed it!

These penguins were a fun winter craft made using nothing but ovals.

"Our School is Cool"

Since Owls are all the rage now, I think I will be recreating this idea in my classroom this year.  The owl is just a coloring sheet owl that I let them color then glue torn construction paper for feathers.

Summer bulletin board using simple shapes the students glued together.

I did the corn on this stalk a little differently - I just cut out a yellow cob shape and green husks and the kids glued popcorn kernels to the cob with a little bit of raffia at the top for the corn silk.  I love my giant scarecrow!

Another cute bulletin board using a classroom craft.  The bunnies are made using a paper plate cut in half.  Half the plate is used for the body and the other half I use to cut out the ears.  The kids cover the body with cottonballs, glue on a wiggly eye and then color the inside of the ears pink.  This is one of my favorites because I can use it for several months.

In this classroom I didn't have cubbies where I could put their papers so I hung their work on this board using push pins.

I had so much fun making this board.  I found some cute animal pictures, blew them up using an overhead projector and traced them onto colored posterboard.

All the preschools I've worked at have been run by a local church and the classrooms are also used as sunday school classes year round, so I always leave a bulletin board up for the summer.  This summer I did a cute board with apples on it reading "Take a Bite out of Summer."  I was so lazy liked the idea so much, that I kept it for my beginning of the school year board and just changed the wording to read "Take a Bite Out of Preschool."

I re-did my tree this year too.  The bottom had gotten kind of ragged and there was no way to fix it without taking the whole tree down.  I like my old tree better, but this one will do.  They turn out differently every time.  I think I might go add some apple to this one until October when I add fall leaves to it.  I put snowflakes on it in the winter and flowers in the spring, so it's a tree for all seasons.

Tomorrow begins the second week of school for me.  I can't wait to see my sweet class!

Join me here:


Monday, July 18, 2011

Christmas in July

Can y'all believe we are only 5 months away from Christmas?  I was in Hobby Lobby the other day and they already have all of their Fall stuff out and several rows of Christmas stuff.  If you are a crafter, especially if you sell your crafts, its time to get started making your holiday items.

As a preschool teacher I tried to come up with an ornament that will be a true keepsake for my students to give their parents at Christmastime.  Not that we don't make our fair share of popcicle stick reindeer and pipe cleaner candy canes and such, but I wanted to make something that would hold up for years and years.  This is what I decided to make.

I purchased the softball sized ornaments.  They come in clear or in frosted.  I've used both, but the frosted version is shown here.  Most craft stores sell these ornaments and they usually come four to a box.  Here's what you'll need:

Ornament
Red, Green and Lime Green Acrylic Paint (GLOSSY)
Black dementional paint
Ribbon
Round Sponge Spouncers
Baby Wipes

Step one is to paint the palm of the childs hand.  Have them hold their hand out straight and stiff.  Place the ornament in the palm of their hand then tell them to grab it and immediately let go.  I usually do a run through of this process before I paint their hand so they know exactly what to do.  If they move their hand and the print gets smeared, no fear, when it is still wet it will wash right off with water and then you can try again.  When you have the handprint on the ornament set it aside to dry.  You can stick a few dowels in a foam block as a drying rack or go ahead and hang them from an ornament hook to dry.  Wash the childs hands off immediately with baby wipes or at the sink with soap and water.  The paint comes off of skin, but will stain fabrics, so be careful.

When the handprint is dry I go back with my round spouncers and add polka dots.  I've found that doing three different sized and different colored dots works best without it looking to polka dotty.  When the dots are dry go back with your black dementional paint and write the childs name and the year.  When everything is dry I tie a piece of coordinating ribbon to the ornament cap and there you go! Easy Breezy!

I'm linking this post to:
view sourceprint? 01 09 10